
Your laptop can feel like a clogged artery, slowing every task you try to push through. You can usually reclaim speed by clearing temporary files, uninstalling unused apps, trimming startup programs, updating Windows and drivers, reducing browser memory use, and adjusting power settings. When heat or aging hardware is the bottleneck, dust cleanup, more RAM, or an SSD upgrade can change the equation, but the real gain often starts with the initial few fixes.
Common Reasons Laptops Slow Down
Laptops usually slow down because startup programs, low disk space, fragmented HDD files, outdated drivers, malware, and heavy visual effects keep consuming CPU, RAM, disk, or GPU resources.
You’ll notice longer boots, stutters, and delayed app launches while these loads stack up.
Should your battery’s worn, power delivery can sag, and thermal throttling can cut clock speeds to protect components, which makes every task feel sluggish.
Heavy multitasking amplifies the problem, especially while background services compete with your active work.
You’re not alone in seeing this; many systems age the same way as caches grow, drivers drift, and cooling efficiency drops.
Identifying the dominant bottleneck helps you target the right fix and regain a responsive, reliable laptop.
Clear Files to Free Up Space
If your laptop’s C drive is nearly full, clear out files to reclaim space and stop the slowdown. You can begin with temporary file cleanup: open Storage in Settings, or run Disk Cleanup, and delete cached installers, browser remnants, and update leftovers.
Next, manage the recycle bin carefully; empty it after verifying you don’t need recovered items, because deleted data still occupies disk space until removal. Check Downloads, desktop clutter, and old project archives, then move rarely used files to external storage or cloud folders.
Keep at least 15% of the drive free so Windows can cache data efficiently, update smoothly, and prevent constant disk thrashing. When you and your system stay organized, performance feels faster and more reliable.
Uninstall Apps You Don’t Use
You should audit installed software and identify programs you no longer use, especially apps that launch background services or reserve storage.
Remove preinstalled bloatware and redundant utilities through Apps & features in Windows Settings to reduce disk usage and background process overhead.
Fewer installed apps mean less storage pressure and fewer CPU and RAM demands during normal system operation.
Find Unused Programs
Unused apps can quietly slow a laptop through consuming storage, background resources, and update checks, so uninstall anything you no longer use. You’ll also reduce concealed background apps and unused background services that keep polling the system after launch.
- Open Settings > Apps, then sort by size, install date, or frequency.
- Remove trial software, old games, and niche utilities you never open.
- Review permission prompts; some apps keep starting sync or telemetry tasks.
- Check Task Manager for processes tied to forgotten programs.
- Restart after uninstalling to release RAM and clear cached hooks.
When you keep only tools you actually use, you shorten scans, free disk space, and help the laptop respond faster.
Remove Bloatware Apps
Bloatware apps often arrive preinstalled from the manufacturer or carrier and can take up storage, run background services, and trigger update checks even whenever you never open them. You should review installed apps in Settings > Apps and remove anything you don’t rely on, especially preinstalled trial software and manufacturer bundled apps.
Uninstalling these programs reduces background CPU usage, lowers memory pressure, and cuts needless network activity. Should an app won’t uninstall normally, you can use the vendor’s removal tool or PowerShell with care. Focus on software tied to promotions, duplicate utilities, and carrier services you don’t use.
As you trim your system, your laptop feels leaner and more responsive, and you stay in control of the setup that matches your workflow.
Free Up Storage
When your laptop’s storage starts filling up, uninstalling apps you don’t use is one of the fastest ways to recover space and reduce background overhead. Open Apps & features, sort by size, and remove software you no longer need. This supports disk space maintenance and keeps your system responsive.
Afterward, check for leftover folders in AppData and Program Files, then empty the Recycle Bin. If you rely on shared files, move them to cloud storage cleanup before deleting local copies. Keep your setup lean, and your workflow stays familiar and fast.
- Remove trialware and duplicate utilities
- Uninstall large games and media editors
- Clear cached installers and patches
- Review sync clients you rarely open
- Reboot to release locked files
Cut Startup Programs
Open Task Manager with Ctrl + Shift + Esc, then check the Startup tab to identify apps that launch with Windows.
Disable unneeded launchers such as chat clients or cloud sync tools to reduce boot-time CPU and RAM usage.
After you restart, monitor startup impact and keep only the items that materially improve your workflow.
Identify Startup Apps
- Check the Startup impact column for load cost.
- Observe the Publisher to confirm the source.
- Compare Enabled items with your daily workflow.
- Watch Last BIOS time for baseline boot data.
- Group similar apps to find recurring offenders.
When you know what’s loading, you and your system can stay in sync.
Disable Unneeded Launchers
You should disable unneeded startup launchers to shorten boot time and reduce background resource use. Open Task Manager with Ctrl + Shift + Esc, then select the Startup tab and review each entry’s status, publisher, and startup impact.
Use launcher startup control to turn off apps you don’t need immediately, such as chat clients, cloud sync tools, or update helpers. This boot sequence trimming frees CPU cycles, RAM, and disk activity during sign-in, so your laptop feels ready faster and stays responsive for your workflow.
Keep core security and driver utilities enabled, but remove extras that don’t support your daily tasks. After changes, restart so Windows loads only the essentials and you can see the cleaner startup path.
Monitor Boot Impact
Once you’ve trimmed startup launchers, check which entries still add the most delay so you can cut boot time more effectively. Use boot time monitoring in Task Manager or Event Viewer to identify services, drivers, and apps that extend startup. With startup delay tracking, you can see whether a chat client, sync tool, or updater stalls the logon sequence. You’re part of a faster system if you measure, compare, and remove only what hurts.
- Open Task Manager and review Startup impact labels.
- Restart after each change to isolate results.
- Observe slow drivers before disabling anything.
- Compare boot duration across several reboots.
- Keep only essential security and hardware tools.
Update Software to Improve Speed
Keeping your software current is one of the fastest ways to improve laptop performance, because updates often patch bugs, fix driver conflicts, and optimize system behavior.
You should apply software patching through Windows Update, vendor tools, and trusted app updaters so you’re not left with unresolved faults that slow response times.
Prioritize driver updates for graphics, chipset, storage, and network devices, since outdated drivers can cause stutters, failed transfers, and unnecessary CPU load.
Check update histories after each install, and restart when prompted so changes fully load.
If you manage your laptop like the rest of your crew, you’ll keep it stable, efficient, and ready for demanding work.
Regular maintenance like this helps your system stay aligned with current performance fixes and security improvements.
Lower Browser and App Memory Use
Even with software updates in place, browser tabs and background apps can still consume a large share of RAM and CPU, so trimming their footprint can noticeably improve laptop speed. You can manage this by closing idle tabs, pausing sync tools, and checking Task Manager for memory hogs. Set tab memory limits in browsers that support them, and unload inactive pages if possible.
- Remove extensions you don’t need.
- Use extension footprint reduction to cut browser overhead.
- Disable auto-starting app features.
- Keep one app per task open.
- Restart after heavy sessions to clear cached memory.
Whenever you keep your workspace lean, you help your laptop stay responsive, and you join a group of users who value disciplined performance tuning and efficient multitasking.
Change Power Settings to Boost Performance
If your laptop feels sluggish under load, changing its power settings can prevent the system from throttling performance to save energy. Open Control Panel, go to Power Options, and select High Performance or a similar plan that keeps CPU frequencies higher and responsiveness consistent.
When you’re on Windows 11, check Settings > System > Power for the same behavior. For battery optimization, switch to Balanced only if you’re unplugged and need endurance.
You can also reduce screen brightness, since the display draws significant power and affects battery life. In advanced settings, disable aggressive sleep timers and processor power-saving limits when your workflow needs sustained speed.
These adjustments help you stay in control, so your laptop works with you instead of holding back.
Clean Dust to Prevent Overheating
Dust buildup inside your laptop can trap heat, force the fans to work harder, and trigger thermal throttling that slows the CPU and GPU. You should power down, unplug, and inspect vents, exhaust ports, and intakes for lint.
Gentle fan cleaning helps restore airflow and keeps your system in the performance zone with the rest of your setup.
- Use compressed air in short bursts.
- Hold the fan blades to avoid overspinning.
- Clean vents with a soft brush.
- Remove the bottom panel only when you’re comfortable.
- Repeat every few months in dusty spaces.
When you keep dust buildup under control, your laptop stays cooler, quieter, and more reliable, so you can work with confidence and feel right at home.
Upgrade RAM or Switch to an SSD
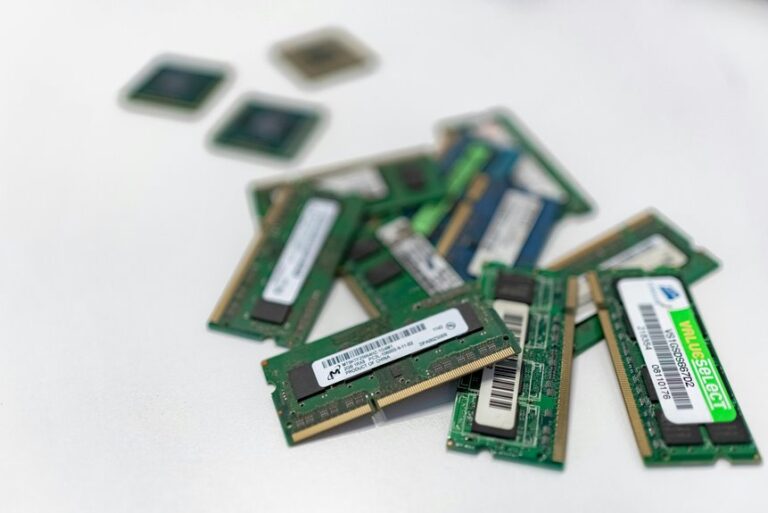
On your laptop still feels sluggish after software cleanup, upgrading the RAM or moving to an SSD can deliver a major performance enhancement. More memory lets you keep browser tabs, office apps, and background tools open without constant swapping, so RAM upgrades for multitasking matter whenever you run Windows 10 or 11. Check Task Manager’s Performance tab to confirm your current capacity and available slots before buying compatible modules.
If your drive is a hard disk, an SSD swap usually brings the biggest gain: faster boot times, quicker file access, and sharper app launches. You’ll notice SSD speed improvements immediately, especially on older systems. Whenever internal upgrades aren’t possible, use an external SSD over USB 3.0 to stay in the performance-focused crowd.
Frequently Asked Questions
How Often Should I Restart My Laptop for Better Performance?
Restart your laptop once a week to clear temporary memory use and refresh background tasks. Reboot sooner after installing software, updating drivers, or when performance starts to slow.
Will a Full Hard Drive Slow Down My Laptop Immediately?
Yes. When your drive gets close to full, your laptop can slow down right away. You may see a disk space warning, and limited free space can reduce caching, updates, and temporary file handling, which hurts responsiveness.
Can Visual Effects Noticeably Affect Laptop Speed?
Yes, visual effects and interface animations can slow your laptop, especially on older hardware. Turning them off can reduce CPU and GPU load, making your system feel faster and more responsive.
How Do I Check if My Laptop Supports More RAM?
Look in Task Manager, your laptop maker’s specs, or the service manual to see the exact RAM upgrade limits. These sources show the available slots, the supported DDR version, and the highest capacity your machine can take.
Should I Defragment an SSD or Only an HDD?
You should defragment only an HDD. SSDs do not need defragmentation, and doing it can add unnecessary wear while improving performance only slightly. Windows automatically skips SSDs during optimize runs.