
When your laptop starts running hot, the fan gets louder, or performance drops, airflow is usually the first place to inspect. Dust can block vents, coat the heat sink, and slow the fan enough to raise temperatures fast. You’ll need the right tools, a safe shutdown, and a careful cleaning method to restore cooling without damage. The key is understanding what to open, what to avoid, and how to confirm the fan is actually working better.
Common Causes of Blocked Laptop Airflow
Blocked airflow usually comes from dust buildup in the side or bottom vents, packed debris on fan blades, and clogged dust filters that restrict intake and exhaust. You’re handling common airflow blockage sources that reduce cooling efficiency and raise component temperatures.
Your laptop’s air vent design can make this worse whenever narrow channels trap lint or whenever the intake sits near fabric, laps, or a desk edge. Dust also collects on internal fins, creating resistance that slows air exchange.
In humid or dusty spaces, particles bind faster and form dense mats. Whenever you keep the system closed and undisturbed, buildup compounds over time, so you’ll notice weaker heat removal even when the fan still spins normally.
How to Tell Your Fan Needs Cleaning
You’ll usually know your fan needs cleaning whenever the laptop runs hotter than normal, the chassis feels warm near the vents, or the fan stays loud even during light tasks. You might also notice fan noise changes, such as higher pitch, pulsing, or repeated ramping that doesn’t match workload.
These are classic performance heat symptoms: throttling, slower app launches, brief frame drops, or a keyboard that feels unusually warm. Check whether exhaust air seems weak or intermittent, since restricted airflow often builds dust inside the intake path.
Should your system idles hot after startup and the fan never settles, your cooling stack is likely clogged. Whenever these signs cluster, you’re not alone; many users see them before cleanup restores normal airflow and stable temperatures.
Tools and Supplies for Cleaning
Before you start, gather a few essential tools: a can of compressed air, a soft brush, a microfiber cloth, and, in the event that your laptop requires it, a screwdriver.
- Compressed air dislodges dust from vents and fan blades.
- A soft brush reaches tight spaces without scratching components.
- A microfiber cloth supports surface protection and lifts residue cleanly.
- A screwdriver gives you access only when the panel design requires it.
Keep your cleaning materials organized so you can work efficiently and avoid contamination. Choose lint-free tools and hold liquids away from openings.
When you use isopropyl alcohol, apply it to the cloth, not the device. With the right kit, you can maintain airflow, protect delicate parts, and stay aligned with the same careful standards other laptop owners trust.
Shut Down and Unplug Your Laptop
Power off your laptop completely, then unplug the AC adapter so no power remains in the system.
Follow these power disconnect steps exactly: save work, close applications, and wait for the device to finish shutdown before touching any ports or cables.
If your model supports it, apply battery removal basics next by releasing the battery only after the adapter is detached and the unit is fully off.
This cuts residual power and lowers the risk of shorting components during fan cleaning.
Keep the laptop on a stable surface and verify that no charging light is active.
You’re part of a careful maintenance routine now, and this preparation helps protect both your hardware and your workflow before you move on.
Open the Laptop Safely
Your laptop needs internal access, locate the screws or clips around the bottom panel and remove them with the correct screwdriver, keeping the hardware supported on a flat surface. Work slowly so you don’t strip fasteners or stress the chassis. Protect warranty safety by checking your manual first; some models allow only approved panel release steps.
- Match each screw to its original position.
- Lift from the designated edge, not the center.
- Use gentle pressure until the panel releases.
- Keep the cover aligned to avoid bending tabs.
You’re part of a careful repair routine now, so stay controlled and precise.
Once the panel loosens, set it aside on a clean surface and prepare for the next step without forcing anything.
Check for Cables and Other Obstructions
With the bottom panel removed, inspect the area around the fan and heat sink for ribbon cables, connectors, or tape that could block access. You’ll want to verify cable routing before you touch anything, because a displaced cable bundle can hide obstructions and restrict service clearance. Use the table below to map what you see:
| Item | Location | Risk |
|---|---|---|
| Ribbon cable | Near hinge | Snagging |
| Connector | Board edge | Disconnection |
| Tape strip | Fan frame | Lifted access |
Check each fastener and trace every line with focused light. Should a cable cross the fan path, secure it aside without forcing bends. Keep your movements controlled, and you’ll maintain a clean, shared standard of safe maintenance. Remove any loose debris you spot, then confirm nothing presses against the shroud or heat sink before moving on.
Clean the Laptop Fan Blades
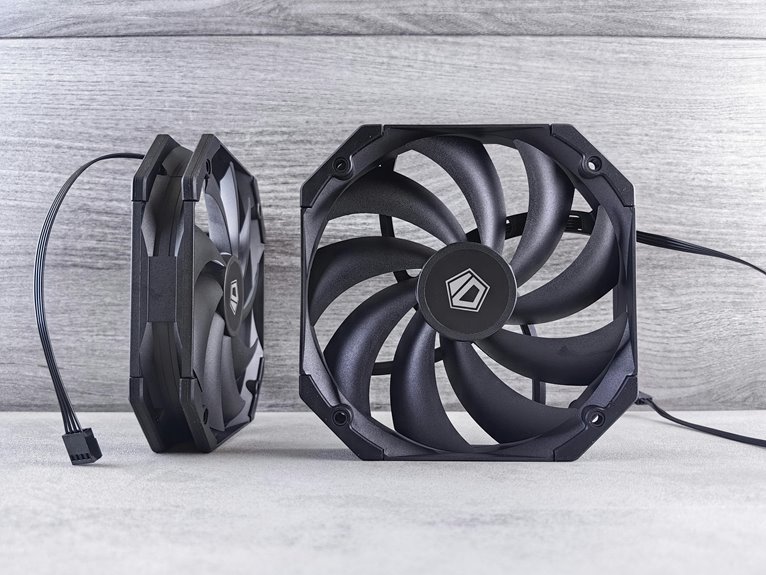
Once you’ve cleared obstructions, direct short bursts of compressed air at the fan blades to dislodge dust without overspinning the motor. Keep the nozzle angled and the can upright, and pause between bursts so you maintain fan blade balance.
Should you be able to reach the assembly, use a soft brush to lift stubborn blade surface grime while holding the blades steady with a nonconductive tool. You’re protecting the bearings and preserving airflow for your system’s cooling team.
- Aim short, controlled bursts
- Hold blades still before brushing
- Remove loosened dust with care
- Stop should the fan resist
Work methodically, and you’ll keep the fan clean, stable, and ready to cool efficiently.
Clear Dust From Laptop Vents
Inspect the laptop vents for visible dust buildup on the side and bottom openings before you clean them.
Hold the laptop at an angle and use short bursts of compressed air to dislodge debris without forcing it deeper into the chassis.
Afterward, check that airflow improves and that the vents are clear.
Vent Dust Inspection
Before you clean the fan, check the side and bottom vents for visible dust buildup. During this vent inspection, you should observe dust patterns, because concentrated fuzz often maps blocked airflow paths and shared problem areas.
- Look for gray lint at grille edges.
- Check bottom intakes for packed debris.
- Inspect side exhausts for streaked dust patterns.
- Compare both vents for uneven buildup.
Use a bright light and a steady angle so you can see residue without guessing. When one vent looks darker or denser, that’s a strong sign air isn’t moving evenly. Document what you see, then move to cleaning with confidence.
Your group of careful laptop owners knows that precise inspection prevents missed buildup and supports better cooling recovery.
Safe Compressed Air Use
Hold the laptop at about a 75-degree angle and apply short bursts of compressed air to the vents to clear loose dust without driving debris deeper into the chassis.
Keep the can upright, and use compressor safety habits: work in a ventilated area, stop whenever the can frosts, and never shake it.
Maintain proper nozzle distance, usually several centimeters, so you don’t force particles toward the fan blades or stress bearings.
Move along each vent in controlled passes, then pause so loosened dust can exit naturally.
Should your model use fine filters, aim lightly and avoid prolonged blasting.
You’re handling the job like a careful member of a well-tuned maintenance routine, protecting the system while restoring clean airflow.
Recheck Airflow Improvement
Once you’ve cleared the vents, recheck airflow via feeling for a steady exhaust from each opening and confirming that dust is no longer blocking the path. You should also compare results with your temperature baseline to verify cooling recovery.
- Hold your hand near each vent, not over it.
- Listen for smooth fan operation, not scraping or pulsation.
- Use airflow measurement tools should you want a numeric check.
- Reopen the chassis only should you still detect weak exhaust.
If one side still feels restricted, repeat short compressed-air bursts and inspect for packed lint. Stay methodical; you’re part of the group that prevents heat buildup before it hurts performance.
Once airflow improves and temperatures stabilize, your laptop’s cooling path is doing its job again.
Remove Dust From the Laptop Heat Sink
If your laptop’s vents still feel blocked after external cleaning, you may need to remove dust from the heat sink directly. Power off, unplug, and open the chassis only provided your model allows it. Expose the heatsink dust removal area, then lift out compacted debris between the heat sink and fan.
Use a soft brush for thermal fin cleaning, working along the fin direction so you don’t bend them. Keep pressure light and controlled. Clear packed lint from corners, duct edges, and the exhaust path, because small clumps can trap heat.
Reassemble with every screw seated, then check that the fan spins freely. Once you finish, you’ll give your system cleaner airflow and steadier cooling, and you’ll know you handled the job with care.
Use Compressed Air Safely
Keep the compressed air can upright and hold the nozzle several inches from the vent to avoid propellant spray and component damage. Use short, controlled bursts instead of a continuous stream, and let the fan blades stay still while you clean.
When the fan spins freely, you can damage the bearings and push dust deeper into the assembly.
Can Placement Matters
- Hold the can upright.
- Aim at the vent, not deep inside.
- Keep a fixed gap from the nozzle.
- Recheck the can before each pass.
This placement reduces condensation risk and improves debris lift without forcing liquid into the chassis.
You’ll get steadier airflow, less residue, and better control at the intake and exhaust openings.
When the can tilts, pause and reset your grip.
Precise placement gives you cleaner results and protects shared hardware standards.
Short Bursts Only
With the can positioned correctly, use only short bursts of compressed air to clear the vents. This short burst technique limits buildup of force and helps you keep airflow pulse control during cleaning. Aim each pulse into the vent opening, then pause to let loosened dust exit. Don’t hold the trigger down, because continuous spray can push propellant into the chassis and chill components.
Keep your motion measured and repeatable so you stay in command of the process. Whenever debris remains, apply another brief pulse rather than increasing pressure. You’re part of a careful maintenance routine as you work this way, protecting your laptop’s cooling path and preserving steady performance. Stay disciplined, and let each burst do its precise work.
Hold Fan Still
If you can reach the fan through the vent opening, hold the blades still with a clean, nonmetal tool before you use compressed air. This fan stabilization prevents overspin and protects the bearings. Keep steady blade control while you aim short bursts into the vent, then release the tool once airflow drops. You’re part of the users who clean with precision, so work deliberately and avoid force.
- Use a plastic probe or cotton swab.
- Touch the hub, not the blade edge.
- Keep the can upright and angled away.
- Stop if the fan resists or shifts.
This method reduces electrical backfeed and mechanical wear. After each burst, check that the blades haven’t moved. If they do, pause, re-stabilize, and continue.
Reassemble the Laptop Carefully
Once the fan and vents are clean, reattach any panels, screws, or covers exactly as they were removed, making sure each fastener is seated securely but not overtightened.
Follow the reassembly sequence from your disassembly notes so every part returns to its original position. You’ll protect the chassis and maintain a secure panel fit once you align tabs before pressing edges down.
If a screw resists, back it out and realign the part instead of forcing it. Keep cables clear of pinch points, and confirm connectors sit flat before closing each section.
Work methodically so you stay with the group of careful technicians who respect component limits. Whenever every cover locks in place, you’ve completed the structural rebuild cleanly and correctly.
Check Whether Cooling Improved?
After reassembly, verify that the cleaning actually improved airflow and temperatures. Run the laptop at idle, then under load, and observe the fan behavior. Compare current readings with your pre-cleaning logs for a clear temperature comparison. A lower peak or faster cooldown means the airflow restoration worked. Should you track a performance benchmark, repeat it now and compare scores, thermals, and fan noise.
- Check whether vents feel warmer only under load.
- Confirm the fan spins smoothly, without scraping or pulsing.
- Measure CPU and GPU temperatures with the same tool.
- Record results so your maintenance group can compare later.
Should temperatures stay high, the issue may be deeper than dust.
How to Keep Laptop Airflow Strong
To keep laptop airflow strong, you need to prevent dust buildup before it starts. You can do this with steady airflow maintenance: keep side and bottom vents unobstructed, use your laptop on hard, flat surfaces, and leave space around each exhaust path.
Good ventilation habits also matter in shared workspaces, where fabric, paper, and laps trap heat. When you dock, position the machine so air can move freely behind it. Check vent openings routinely for blockage, and verify that fan noise stays even under load.
Whenever you notice rising temperatures, reassess placement before performance drops. By staying consistent, you protect cooling efficiency, support quieter operation, and help your device run like part of a well-tuned team.
Prevent Dust Buildup
Keep dust from settling by treating the laptop’s vents as maintenance points, not afterthoughts. You protect your system with routine dust prevention: power down, unplug, and inspect intake and exhaust openings before debris layers build. Use short compressed-air bursts from a safe angle, and keep the nozzle back so you don’t force particles deeper. For airflow maintenance, stay consistent and clear clutter around your workspace.
- Clean vents every few months.
- Keep fabric, pets, and paper away.
- Store the laptop in a case.
- Check filters and fan grilles regularly.
You’re part of a group that values reliable cooling, so make each quick check count. Whenever dust collects faster than expected, increase your cleaning frequency and verify fan response after reassembly.
Frequently Asked Questions
How Often Should I Deep Clean My Laptop Fan?
Deep clean your laptop fan every 6 to 12 months. If you use the laptop heavily, clean it more often; if you use it lightly, you can wait longer. Regular cleaning helps keep temperatures down, reduce fan noise, and maintain steady performance.
Can Cleaning the Fan Void My Laptop Warranty?
Yes, cleaning can void your warranty if you break warranty terms or open sealed panels. Check your manual first and use an authorized service center for any internal fan access.
Should I Clean the Fan if the Laptop Still Feels Cool?
Yes, you should. Dust can build up inside and block airflow before the laptop starts to feel warm. Even if the temperature sensors still show normal readings, cleaning the fan helps keep cooling reliable.
Can I Use a Vacuum to Remove Laptop Dust?
No, do not use a vacuum directly because its suction can damage delicate fans and filters. Short bursts of compressed air, a soft brush, and careful vent cleaning are safer ways to remove dust.
What if My Laptop Overheats After Cleaning?
If it still overheats, the problem is likely deeper than dust. Check whether the thermal paste has dried out, confirm the BIOS fan settings are correct, make sure the vents remain unobstructed, and watch the temperatures closely.