
Your laptop opens Chrome, Outlook, and File Explorer, then stalls for 20 seconds; that usually points to startup load, low disk space, or a failing drive. You can isolate the cause using Task Manager, storage use, malware scans, and system updates, but one concealed issue often changes the whole diagnosis. Identify that initially, and the fix gets much more precise.
What’s Slowing Down Your Laptop?
Your laptop usually slows down for a few predictable reasons: too many startup and background processes, low available storage, outdated Windows or drivers, malware, or failing hardware.
You can diagnose each one by checking CPU, memory, disk, and temperature behavior in Task Manager and Windows Security. If storage stays nearly full, performance drops as the system struggles to write temporary data.
If your fans run hard and the chassis feels hot, thermal throttling may be limiting speed. Hardware aging can also reduce responsiveness as drives, batteries, and cooling systems wear.
Outdated drivers or Windows builds can leave efficiency fixes unapplied, while malware quietly consumes resources. When you understand these signals, you’re not guessing—you’re isolating the fault and choosing the right recovery path with confidence.
Close Startup Apps to Speed It Up
once a laptop feels slow right after login, startup apps are often the reason, because they load automatically and compete for CPU, memory, and disk access before you’ve even opened anything.
Open Task Manager, check the Startup tab, and sort for startup impact so you can spot the worst offenders fast.
Disable anything you don’t need immediately, like chat tools, cloud sync, and launchers, while keeping security and driver utilities enabled.
This selective cleanup reduces boot time and trims background load, giving you a smoother initial-minute experience.
You’re not alone when your system feels burdened; most machines accumulate extras over time.
Revisit this list after each install, and you’ll keep boot optimization tight without sacrificing the apps you actually rely on day to day.
Free Up Disk Space
If your laptop is low on free storage, performance often drops because the system has less room for temporary files, updates, and virtual memory. You can recover responsiveness through doing focused temporary files cleanup and recycle bin management, then removing large downloads you don’t need. Check Settings > System > Storage to see which categories consume space, and clear cached installers, old logs, and duplicate media. Keep at least 20% free capacity so Windows can write swap data without choking.
- You’ll feel control return.
- You’ll cut waiting times.
- You’ll reduce update failures.
- You’ll protect your workflow.
After cleanup, restart your laptop and verify free space again. Should storage stays tight, move archives to external media or cloud storage.
Scan for Malware and Adware
Malware and adware can quietly consume CPU, memory, disk activity, and network bandwidth, so a full scan is one of the fastest ways to rule out a concealed performance drain. You should run trusted malware scan tools, let them inspect startup items, browser extensions, and scheduled tasks, then quarantine anything flagged as suspicious.
Unless the scan finds adware, follow the vendor’s adware removal steps exactly, because partial cleanup often leaves residual processes and registry hooks active. You’ll usually see quicker launches, lower fan noise, and steadier responsiveness after removal.
Unless your team uses the same laptop environment, keep scans consistent across devices so everyone gets a cleaner baseline and fewer concealed interruptions. Recheck after reboot to confirm the threat’s gone.
Update Windows and Drivers
After you rule out malware, update Windows and your drivers so the laptop can pick up performance fixes, compatibility patches, and stability improvements that often resolve concealed slowdowns.
Open Settings > Windows Update, install pending patches, then reboot and recheck for updates. Provided a patch stalls, use Windows update troubleshooting to clear the cache and retry.
Next, get chipset, graphics, storage, and network drivers from your PC maker or device vendor; generic drivers can miss driver compatibility improvements that your system needs.
- You regain trust in your machine.
- You cut concealed errors that drain CPU time.
- You reduce crashes during routine work.
- You join other users who keep systems current.
Provided problems persist, record the failing device and version numbers.
Switch to a Faster Power Mode
Switching to a faster power mode can immediately remove an artificial throttle on performance, especially on laptops set to Balanced or Power saver. Open Power & battery settings, then choose Best performance or the highest available plan.
Should you’re on AC power, this change lets the CPU sustain higher acceleration states longer and reduces aggressive frequency scaling. Check whether battery saver profiles are active, because they can cap background activity and dim response times.
On many systems, balanced power settings trade speed for efficiency, which is fine for travel but not for recovery work. You belong in the fast lane during you’re diagnosing lag, so test the laptop under the new mode, then compare app launch times, scrolling smoothness, and fan behavior.
Tame Browser Tabs and Extensions
You should close idle browser tabs, because each open tab can hold memory, CPU, and network resources.
Remove heavy extensions that constantly run scripts or inject content, since they can slow page loads and increase background activity.
Limit startup add-ons so your browser doesn’t launch with unnecessary processes that delay system responsiveness.
Close Idle Tabs
Too many open browser tabs can quietly drain RAM and CPU, especially whenever extensions keep running in the background. You can cut tab overload through closing pages you aren’t using and saving the rest in bookmarks or a reading list. This reduces browser clutter, lowers memory pressure, and helps your laptop respond faster.
- Close duplicate tabs initially.
- Pin only essential tabs.
- Suspend inactive tabs provided your browser supports it.
- Reopen saved pages provided you need them.
You’ll feel less visual strain and more control, like your workspace finally matches your pace. Diagnostic check: provided performance improves after trimming tabs, browser demand was the bottleneck. Keep your tab count intentional, and you’ll stay part of a faster, calmer workflow.
Remove Heavy Extensions
Browser tabs aren’t the only browser load worth trimming; extensions can quietly keep scripts, trackers, and background services running even while a page looks idle. You should run an extension audit and disable anything you don’t actively use, especially ad blockers, coupon tools, and PDF helpers that duplicate built-in features.
Check plugin permissions closely: should an add-on can read every site, access downloads, or run on startup, it’s doing more than you need. After each change, reload the browser and watch memory, CPU, and page responsiveness.
You’re not alone in this cleanup; every leaner profile helps the whole laptop feel more responsive. Re-enable one extension at a time should you need it, then keep only the ones that prove their value.
Limit Startup Add-Ons
Trim startup add-ons so your browser doesn’t pile on extra work before you’ve even loaded a page. You gain boot sequence control when you disable auto-launching tabs, chat tools, and sync helpers, then apply startup add on prioritization to keep only what you truly need.
- You’ll feel relief once your laptop reaches the desktop faster.
- You’ll notice calmer fans once fewer extensions wake up.
- You’ll avoid the frustration of delayed logins and frozen tabs.
- You’ll belong to the group of users who run lean, deliberate setups.
Audit browser settings, remove nonessential add-ons from startup, and keep the rest manual. Then test launch time, memory use, and CPU load. Unless a tool isn’t essential at sign-in, don’t let it compete for your opening seconds.
Stop Unneeded Background Apps
You can identify heavy background apps in Task Manager by checking CPU, memory, and disk usage, then closing the ones that aren’t essential. Disable unnecessary startup programs so they don’t launch at boot and keep consuming resources.
Should performance is still poor, turn off nonessential services to reduce background CPU and RAM load.
Identify Heavy Background Apps
Heavy background apps can quietly drain CPU, RAM, and disk resources, so check Task Manager to identify processes that are using unusual system capacity. Your task manager monitoring should focus on sustained CPU spikes, high memory footprints, and constant disk activity. This resource hog identification helps you separate normal services from the apps dragging your laptop down.
- Watch for apps with rising CPU usage.
- Flag memory-heavy processes that stay active.
- Observe disk-bound tasks causing constant waits.
- End only nonessential apps you recognize.
When you isolate the offender, you regain responsiveness and feel in control again. You’re not alone in this; many users solve slowdowns by tracing background load before changing anything else. Repeat the check after a few minutes, because some apps cycle their demand.
Close Startup Programs
Even before Windows fully loads, startup programs can steal CPU, RAM, and disk bandwidth, so review them and disable anything you don’t need at boot. Open Task Manager’s Startup tab and sort by startup impact to spot the worst offenders. If an app isn’t essential for your workflow, turn it off and keep boot sequence control tight.
You’ll still launch it manually when needed, but your laptop won’t spend energy loading it every session. Recheck the list after installs, because new software often adds itself back. Focus on launchers, chat tools, cloud sync clients, and updaters that you don’t need instantly.
This simple triage helps your system feel responsive, reduces delay at sign-in, and gives your machine a cleaner, more predictable start together.
Disable Unnecessary Services
Whenever startup apps aren’t the only drain, unnecessary background services can keep eating CPU, RAM, and disk activity long after sign-in. You should open Services, sort by status, and perform a service dependency review before disabling anything. Focus on noncritical service auditing: printers you don’t use, vendor updaters, sync helpers, telemetry, and leftover utilities. Stop one service at a time, then reboot and watch Task Manager for regressions.
- You’ll feel relief once fans quiet down.
- You’ll regain control as memory pressure drops.
- You’ll avoid frustration once lag stops masking your work.
- You’ll belong to the small group that tunes systems, not just tolerates them.
Keep Microsoft core services enabled, document each change, and re-enable anything that breaks sign-in, networking, or security.
Check RAM Usage
Open Task Manager and check the Performance tab to see how much RAM your laptop is using in real time.
In the task manager performance view, compare used memory against total capacity and watch for sustained memory pressure while you work.
When usage stays high with only a few apps open, your system is likely paging and feeling sluggish.
You can confirm this through noting which processes consume the most memory in the Processes tab.
Close only nonessential apps, browser tabs, and background tools that you recognize and trust.
When RAM sits near its limit during ordinary tasks, your laptop might need more memory to stay responsive.
Staying aware of this metric helps you make informed fixes and keeps you part of the group that troubleshoots performance methodically, not randomly.
Optimize Your Drive
- Check the drive type.
- Confirm scheduled optimization.
- Remove bulky files you no longer need.
- Reboot and retest responsiveness.
If the system feels sharper after this pass, you’ve likely restored healthy drive behavior and improved everyday performance without risky changes.
Run a Disk Health Check
Should the laptop is still dragging, run a disk health check to rule out failing storage as the cause. You can use CHKDSK in Windows or your drive maker’s diagnostic tool to scan for bad sectors, disk surface errors, and file-system corruption. Pay close attention to SMART health warnings, because they often flag impending drive failure before the system stalls or data vanishes.
Should the tool reports errors, back up your files right away and let the utility repair what it can. Whenever it finds repeated faults, replace the drive instead of chasing software fixes.
Should your checks come back clean, you’ve narrowed the problem and can move forward with confidence. You’re not guessing; you’re isolating the fault with a method your support-minded peers would trust.
Reduce Visual Effects
With disk health ruled out, shift your attention to the interface itself, because Windows visual effects can tax CPU and GPU resources on an older laptop. Open display settings, then reduce transparency, shadows, and other cosmetic effects that you don’t need. In animation settings, choose the option that prioritizes performance over appearance. This change won’t fix failing hardware, but it can restore responsiveness and help your system feel more cooperative.
- You’ll notice faster window movement.
- You’ll reduce frame drops during basic routing.
- You’ll reclaim resources for essential apps.
- You’ll feel in control again, not stuck.
If you’re part of a team that values practical fixes, this adjustment belongs in your standard recovery routine. Keep testing after each change so you can confirm the gain.
Fix Overheating and Dust Buildup
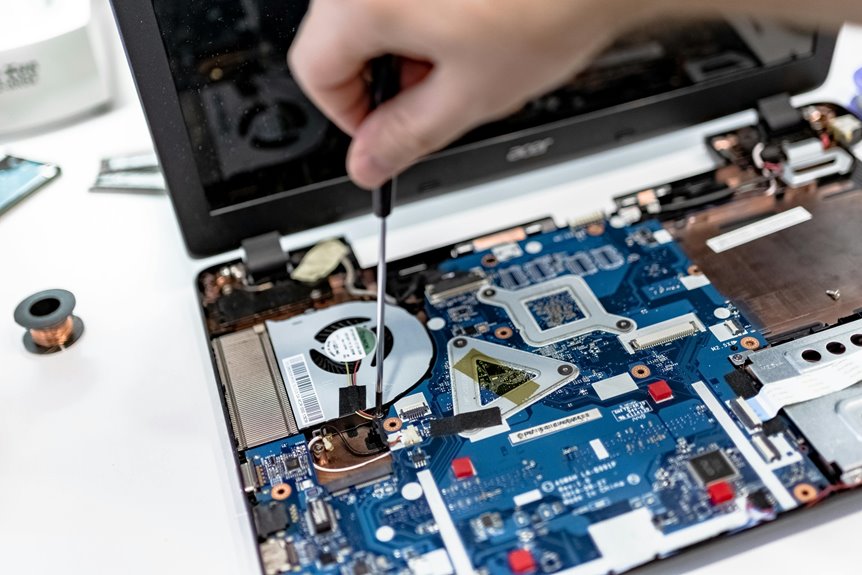
When dust clogs the vents or fan, your laptop traps heat, then throttles the CPU and slows everything down. You can confirm overheating using checking fan noise, hot chassis zones, and sudden clock drops under load. Power off, unplug, and clean the vents with compressed air; in case your model uses one, perform dust filter cleaning to restore airflow.
Keep the unit on a hard surface so intake stays clear. In case temperatures still spike, thermal paste replacement may be necessary because aged compound reduces contact between the CPU and heatsink. Watch for repeated thermal throttling in demanding tasks; that’s a sign the cooling path needs attention. You’re not alone here—many slow systems recover once heat is managed correctly.
Upgrade RAM or Storage When Needed
If Task Manager shows sustained RAM pressure during normal use, you should add more memory to reduce paging and improve multitasking throughput.
If the laptop still feels slow and the drive is a mechanical HDD, you’ll usually get a larger performance gain by switching to an SSD. These upgrades target the main hardware bottlenecks that limit system responsiveness.
Adding More RAM
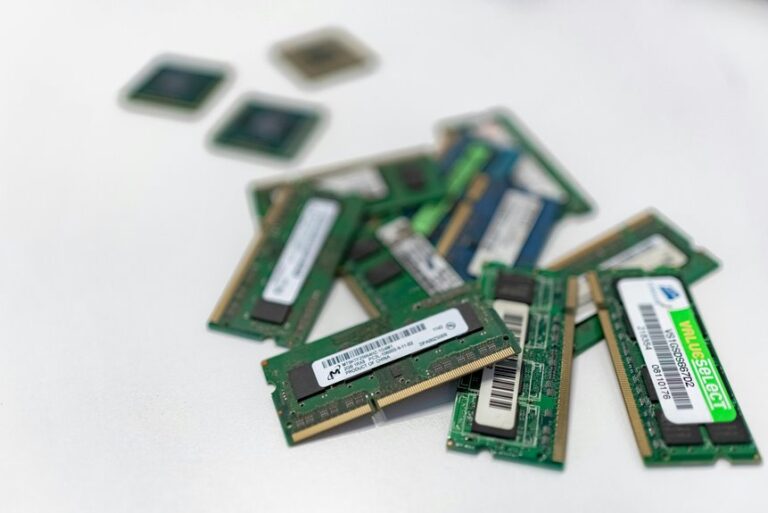
Upgrading your RAM can immediately improve a slow laptop’s multitasking capacity using giving the system more memory for active applications, browser tabs, and background processes. You should verify memory capacity planning before buying: check your motherboard’s slot count, supported DDR generation, and maximum capacity in Task Manager. Then compare current usage against available headroom. When you’re regularly near saturation, you’ll see multitasking performance gains after adding matched modules.
- Fewer freezes during app switching
- Less browser tab lag
- Faster response under load
- More confidence in your machine
Unless your laptop supports upgradeable DIMMs, choose the same speed and voltage. Unless it’s soldered, you’ll need a higher-capacity device. Monitoring RAM usage helps you decide whenever your system’s finally ready to keep up with you.
Switching to SSD
Even with enough RAM, a laptop can still feel sluggish provided its storage is the bottleneck, and switching from a hard drive to an SSD usually delivers the biggest speed improvement. You’ll notice faster boot times, quicker app launches, and less pause when you open files because an SSD cuts access latency and eliminates mechanical seek delays. For SSD installation benefits, check your laptop’s drive bay, clone the old disk, then verify TRIM and firmware updates after installation.
Provided you’re planning a storage migration strategy, back up data first, confirm capacity, and match the drive’s interface, such as SATA or NVMe, to your system. That upgrade helps your machine feel responsive again, so you can work with the same focused, capable crowd.
Frequently Asked Questions
How Often Should I Restart My Laptop for Best Performance?
Restart it daily if you want the fastest response time; for lighter use, a weekly restart is usually enough. Daily restarts clear memory leaks, reset background tasks, and help keep your laptop running smoothly.
Can BIOS Updates Improve Laptop Speed?
Yes, a BIOS update can make a laptop feel faster when it fixes firmware bugs, improves device communication, or shortens startup time. It may reduce boot errors and improve stability, but it will not usually solve slow performance caused by software, too many startup apps, or a weak CPU.
Is SSD Defragmentation Ever Necessary?
No, you should not defragment an SSD. It does not improve speed and can increase unnecessary write activity. Use TRIM and the drive’s built in wear leveling instead, since they help keep performance steady and protect the drive over time.
How Do I Safely Disable Services With Msconfig?
Open msconfig, go to the Services tab, select Hide all Microsoft services, then disable only the nonessential entries one at a time. Use startup troubleshooting and selective booting, restart, and test. Restore anything that causes problems to keep your system stable.
When Should I Replace My Laptop Instead of Upgrading It?
Replace your laptop when its hardware cannot keep up even after RAM or SSD upgrades, the battery no longer holds a reliable charge, or diagnostics point to a failing motherboard, storage drive, or cooling system. If slow performance remains after those upgrades, replacement is usually the smarter choice.